If you are looking for a complete guide on how to use Notion for beginners, then you are at the right place.
So it is roughly about 2 years that I started using Notion.
The first time I was introduced to it was through a video I saw on YouTube that spoke about the founders and how they changed the market upside down.
When you hear that kind of a comment for a software, you will surely feel like checking it out.
And that is how I first encountered Notion.
To be frank, the first perception wasn’t great.
I felt like it was a maze and there were a lot of things that I had to master and learn in order to start using the tool.
So, I browsed around for a day or, so and then left it.
It wasn’t until after 2 months that I came back to Notion.
My productivity was all over the place.
It so happened that I was searching for a particular information that I had jotted down somewhere. Since it was a very important piece of information, I had no option but to search to find it.
I had 3 apps to manage my To-dos, 4 note taking apps – Samsung Notes, Google Notes, Evernote and OneNote, and a tone of notes lying here and there on Notepads.
You can imagine, how difficult that task of searching for one piece of information, would have been!
It took me 2 hours and little more to finally find it.
Which literally meant that I wasted 2 hours of my precious time.
I felt disorganized to the core.
And that was leading to a loss of productivity.
I had to do something about it.
That is when I recollected about this software that I had downloaded but had not used (I am talking about the desktop version of Notion here).
I wiped the dust of it, and got started all over again.
And in another month or, so, I had got everything organized and fixed.
Notion became my one stop shop – my note taking app, my To-do app, My time keeper, My Calendar, My finance tracker, My Productivity tracker, My habit tracker and everything else.
Now you might be thinking – how did I do this with something that was supposed to take a long time to learn?
The truth is – it isn’t as difficult as it looks or, is made to look.
Notion is probably the easiest to manage if you understand some basic concepts of the software and how it works.
And that is precisely what I want to do with this post.
My objective with this blog is to help you learn Notion and use it to streamline your day and life without the overwhelm, in the simplest possible way.
And along the way, I will give you free templates that you can download and use, while also teaching you how to create those templates.
Ready?
Let’s get started!
What is Notion?
To define it, Notion is a versatile productivity tool that combines multiple functionalities into a single application.
Who can use it?
Almost everybody will have a use case – students, professionals, and teams.
Its core features revolve around note-taking, task management, database creation, and project organization, making it an all in one workspace that streamlines workflows.
The key word there is “Streamline”.
After all that is what you want in life. Isn’t it?
If you are a beginner, understanding how to use Notion can seem a little overwhelming.
But like what I said, the interface is so intuitive that you as a user can customize it according to your needs.
Now, one of the most appealing aspects of Notion is its flexibility.
You can create a variety of content types, such as documents, to-do lists, tables, and databases, within a clean, aesthetically pleasing interface.
In one word it means that the tool is “adaptable”.
This adaptability helps you mix and match components, and create dashboards and workspaces that suits your needs.
For instance, if you are a student, you may find value in using Notion to consolidate class notes, assignments, and study schedules. At the same time if you are a professional, you can use it for project tracking, collaboration, and goal setting.
The best part about Notion is its collaborative and sharing functionalities.
And that too in real-time.
Imagine working on the same document with your team members, seeing their changes as they happen.
This is a game-changer, especially if you’re in an environment where communication and coordination are key to success. By using Notion, you can facilitate discussions and ensure everyone stays updated on project developments.
But to truly unlock the potential of Notion, it’s important to familiarize yourself with its extensive library of templates and community-driven resources. Trust me, these templates are gold.
They provide guidance on how to use Notion effectively right from the start, making it so much easier for you to maximize this all-in-one workspace.
Now with all of that out of the way, let us get into using Notion and start with setting up a Notion account.
Setting Up Your Notion Account
So, you’re ready to dive into Notion?
Great choice!
The first step is to create your account. Notion offers both free and premium plans, so you can pick what suits your needs best.
Just head over to the Notion website and click on the “Sign Up” button. You can sign up using your email, or use your Google or Apple account to make things even simpler.
Here’s the link to do that –
Once you’re in, you’ll be greeted by Notion’s clean and minimalistic interface. Don’t let its simplicity fool you—this tool is packed with features.
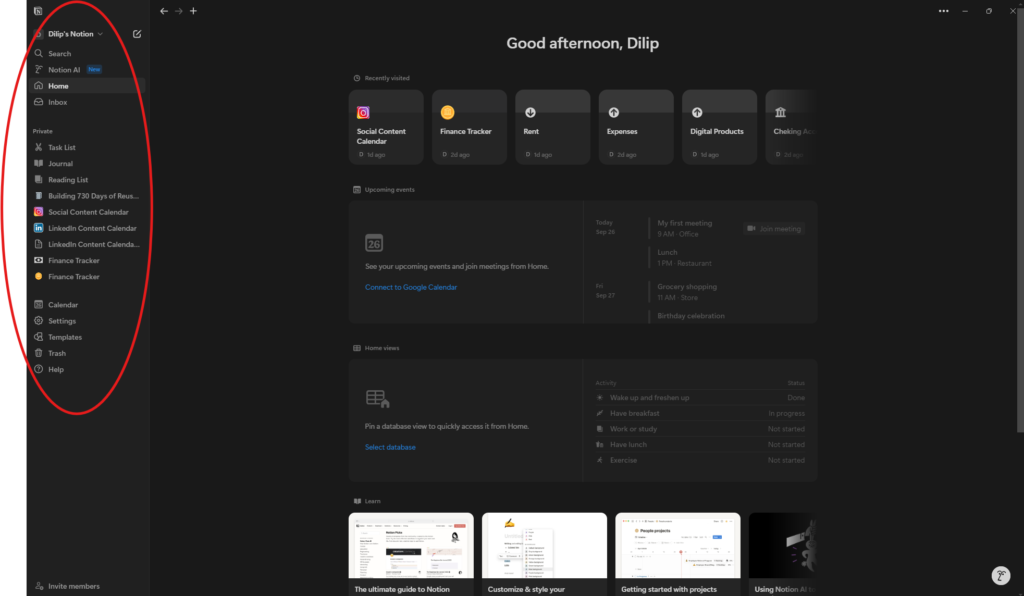
On the left, you’ll see the primary navigation panel. This is where your workspace, pages, and any documents you create or import will live.

Take a moment to familiarize yourself with the layout; it will make your Notion journey much smoother.
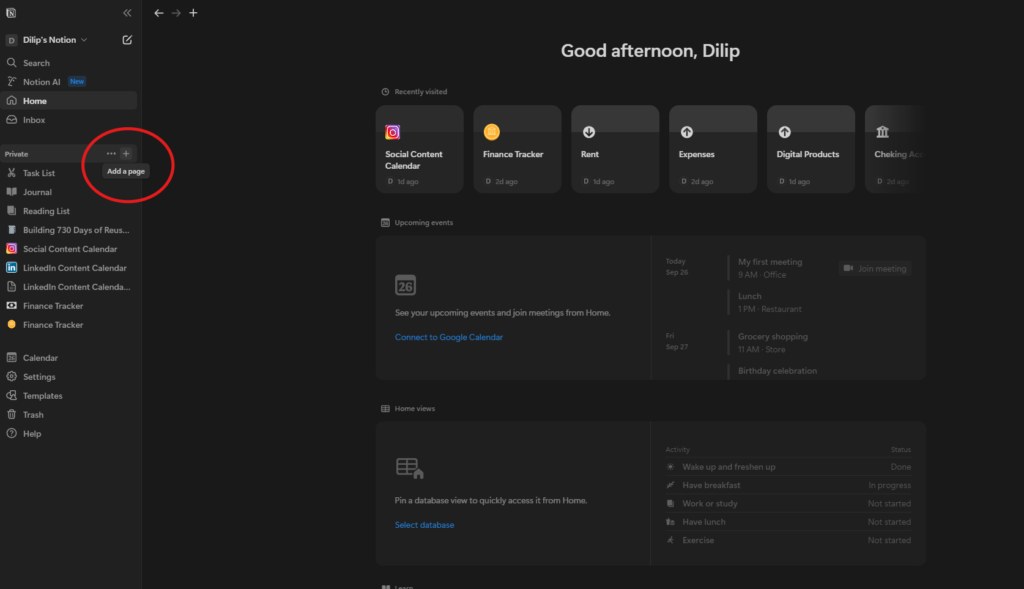
To get started, try creating a new page. Just click on the “+ New Page” option in the sidebar.

From there, you can organize your thoughts, jot down notes, or plan out your tasks. Notion provides a variety of templates that can enhance your workflow.
Feel free to adjust the layout and features to suit your personal preferences—change fonts, tweak colors, add icons.
Making it your own will not only make the experience more enjoyable but also help you stay organized and productive.
Here’s a tip: while setting up your account, take advantage of some of Notion’s shortcuts and collaborative features. The more you explore and customize your workspace, the more you’ll see how Notion can be tailored to fit your unique productivity needs.
Getting to Know the Interface
Now that you’ve got Notion open, let’s take a tour of the interface. At first glance, it might seem a bit overwhelming.
But trust me, once you get the hang of it, you’ll wonder how you ever managed without it.
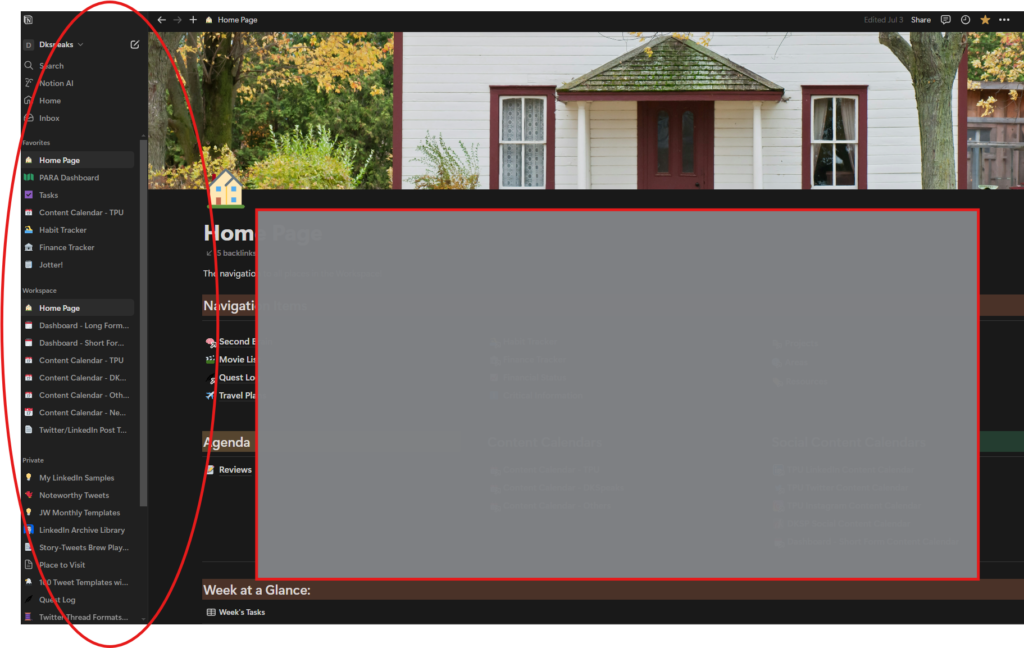
On the left side, you’ll see the sidebar. Think of this as your navigation hub.

It gives you quick access to all your pages and workspaces, allowing you to create, organize, and manage different sections with ease.
Feel free to customize the sidebar to suit your preferences—you can add icons to pages to make them stand out. It’s a neat little trick to optimize your experience.
In Notion, everything revolves around pages. These are like individual workspaces where you can jot down notes, manage tasks, or organize information.
Within each page, you’ll use something called blocks. Blocks are the basic units of content—they can be text, images, bullet points, checklists, and so much more.
Understanding how blocks work is essential because they are, quite literally, the building blocks of your Notion experience.
Now, let’s talk about databases. If you want to take your organization to the next level, databases are your friend.
Notion supports various types of databases like tables, boards, calendars, and galleries. This flexibility allows you to store and manipulate data in structured formats.
As you spend more time with Notion, you’ll discover efficient navigation techniques and best practices. Combining pages, blocks, and databases effectively is the key to optimizing your workflow.
Creating Your First Page
Alright, let’s get hands-on and create your first page. This is where the fun begins.
In Notion, you can set up various types of pages—notes, to-do lists, project trackers—you name it.
And the best part?
You can tailor each page to meet your individual needs, enhancing your organization in the process.
To start, head over to the sidebar and click on “New Page.” This will open up a blank canvas where you can give your page a title.

Maybe it’s “Weekly Tasks,” “Project Ideas,” or anything else you want. From there, you can start adding content using different elements like headings, lists, images, and tables.
Understanding how to integrate these components is key.
For headings, simply type your text and then select the heading level you want—Heading 1, Heading 2, or Heading 3.
This helps you organize your content hierarchically.
Need to make a list?
Just start a new block with bullet points or numbers, and you’re good to go.
Want to add an image?
Use the “Image” block to visually represent your ideas.
Tables are also a fantastic way to keep track of different elements in your projects. Notion allows you to create simple tables or even more complex databases where entries can be filtered and sorted.
As you get more comfortable, don’t hesitate to explore Notion’s templates for advanced layout ideas. These tips will enhance your ability to use Notion efficiently.
Understanding Blocks and Formatting
Now, let’s talk about blocks—the heart and soul of Notion.
If you’re wondering what a block is, think of it as a Lego piece.
Each piece can be moved, customized, and connected to build something amazing. In Notion, everything you add to a page is a block—text, headings, images, to-do lists, even entire databases.
This modular approach allows you to customize your pages easily, which is crucial for staying organized.
Creating a block is simple.
You can start by typing, or click the plus (+) icon that appears when you hover between blocks.
Want to rearrange things?
Just drag and drop the blocks to where you want them.
This flexibility is super helpful, especially when you’re still figuring out how to structure your information.
Formatting your blocks can greatly enhance your Notion experience. You can make text bold or italic, add bullet points or numbered lists, and even insert toggles, quotes, or dividers.
These formatting options help maintain clarity and focus, making it easier for you to find and reference information without feeling overwhelmed.
But blocks aren’t just for basic content—they’re also essential for creating databases. Getting familiar with database blocks will be a game-changer.
They enable you to categorize, filter, and sort information effectively. By integrating content and database blocks, you create a seamless workflow.
Understanding blocks and how to format them is vital for making the most of this powerful application.
Using Templates to Get Started
Feeling a bit overwhelmed with all the possibilities?
Don’t worry; Notion has got you covered with its extensive library of templates.
These templates are like ready-made setups that can help you kickstart your projects and enhance your productivity.
For beginners, exploring these templates is a fantastic way to familiarize yourself with Notion’s functionalities. It keeps your tasks and information organized.
To access the templates, simply navigate to the Notion template gallery from the application or website. You’ll find a treasure trove of options tailored to different needs.
Looking to organize your personal life?
Check out the habit trackers and daily planners.
Need something for work?
There are templates for project trackers, meeting notes, and team wikis to streamline collaboration.
If you’re a student, you’ll find templates for lecture notes and study schedules that can make your academic life a lot easier.
Once you find a template that fits your goals, customizing it is a breeze. You can add or remove blocks, change headings, incorporate images or tables—whatever you need to make it your own.
This level of customization ensures that you’re using Notion in a way that aligns with your workflow and objectives.
By utilizing templates, you can harness Notion’s power right from the start. It significantly improves your productivity.
Plus, this initial experience with templates will encourage you to explore more of the platform’s functionalities as you become more comfortable.
Integrating Notion into Your Workflow
So, how do you make Notion a seamless part of your daily life?
It’s all about establishing consistent habits.
Try dedicating a specific time each day—perhaps first thing in the morning—to plan and review your tasks in Notion. This not only sets the tone for your day but also helps you prioritize what’s important.
Using a daily planner template can streamline this process, saving you time while providing structure.
Task management is another area where Notion shines. Start by creating a database for your tasks.
You can categorize them based on projects, deadlines, or any criteria that make sense to you. This visual organization helps you track your progress.
Customize properties by adding checkboxes for completion statuses or due dates to keep tasks on your radar. Adopting this systematic approach makes task management straightforward and less overwhelming.
To amplify Notion’s effectiveness, consider syncing it with other productivity tools. Linking your calendar with Notion ensures that all your deadlines and appointments are tracked in one place.
You can also integrate it with to-do list apps for seamless updates. By doing this, you create a centralized hub for all your tasks, reminders, and schedules.
If you’re feeling adventurous, explore Notion’s API features for automation. This allows you to connect Notion with other tools and services, enabling a fluid workflow.
In short, smoothly integrating Notion into your daily routine and syncing it with your preferred productivity tools can greatly enhance your organization and efficiency.
Collaboration and Sharing in Notion
If you work with a team, Notion can be a game-changer. It offers features designed to enhance teamwork and boost productivity.
One key functionality is the ability to share pages with others seamlessly. You can invite team members via email or share a link, granting appropriate access levels based on the project’s needs.
This way, everyone can access and contribute to shared documents in real-time. It ensures that you’re all on the same page—literally.
Collaborative editing is another standout feature. Multiple users can work on a document simultaneously, making changes and seeing updates as they happen.
This real-time feedback loop minimizes the risk of miscommunication because everyone can see edits as they occur.
If you’re new to this, make sure to check out Notion’s version history. It’s a lifesaver—it allows you to revert to previous edits if needed, ensuring that no valuable input is lost.
Notion’s commenting feature also enhances communication within teams. You can leave comments directly on specific parts of a document, allowing for focused discussions.
This moves you away from lengthy email threads or external communication platforms. For example, if your team is developing a marketing campaign, you can discuss strategies within the Notion page dedicated to that campaign.
Whether you’re tracking project progress or sharing insights, Notion provides a centralized hub for collaboration. By utilizing these features effectively, you can foster a more organized and communicative environment.
Best Practices and Tips for Notion Beginners
As you start your journey with Notion, a few strategies can significantly enhance your productivity and organization. Here are some essential tips to help you get the most out of Notion.
First, make the most of templates. Notion offers a variety of pre-made templates that can serve as a solid foundation for your projects.
By customizing these templates, you can tailor them to suit your individual needs and save time in the long run.
Next, focus on organizing your workspace. Create a clear hierarchy with pages, sub-pages, and databases to ensure easy navigation.
Use headers and dividers to structure content logically. This not only helps you access relevant information quickly but also maintains clarity throughout your workspace.
Getting familiar with keyboard shortcuts is equally important. Shortcuts enhance efficiency, allowing for smoother navigation and editing within the application.
For instance, using the ‘/’ command lets you insert various blocks quickly. ‘Cmd/Ctrl + Z’ allows for swift undo actions.
Investing time in learning these shortcuts can significantly ease your learning curve.
If you run into any issues, don’t hesitate to consult Notion’s extensive documentation and community forums. You’ll often find that challenges like formatting troubles have already been addressed by others.
Also, don’t be afraid to experiment and explore different features. Trial and error can lead to discovering effective workflows that suit your personal style.
By integrating these best practices into your daily Notion usage, you’ll be well-equipped to maintain organization and boost productivity.
The more you use Notion, the simpler it will become to navigate and manage your tasks, leading to a more streamlined experience.
I hope this beginner’s guide to use Notion was helpful.
If you have any questions, you can drop them in the comments box below and I will respond to it.
